How to Operate App (Android)
Downloading App
Downloading App at Google Play
-
Enter “ocrenger” to search at Google Play and download the app.
* You need to have a Google account to download the app.
* The app is free.
You can also go to the downloading page by reading the QR code.
Updating App at Google Play
-
Launch the Google Play Store.
-
Tap your account in the top right corner of the screen.

-
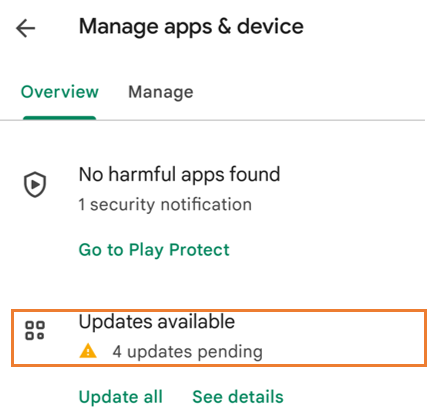
Select "Manage apps & devices".

-
Tap "Update Available". A list of apps that can be updated is displayed.
-
Tap "Update" to the right of the ocrenger app. (If you don't see the ocrenger app, try connecting again in a few hours)

Manage account
Registration of Account
-
When downloading is complete, launch the app.

-
Confirm the details of the consent form and tap AGREE.

-
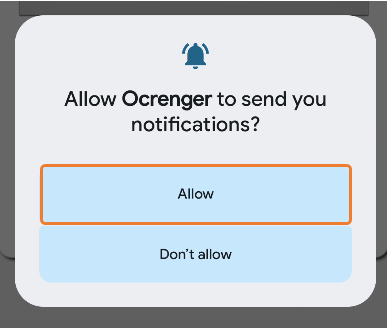
If a notification dialog box appears, press "Allow".
-
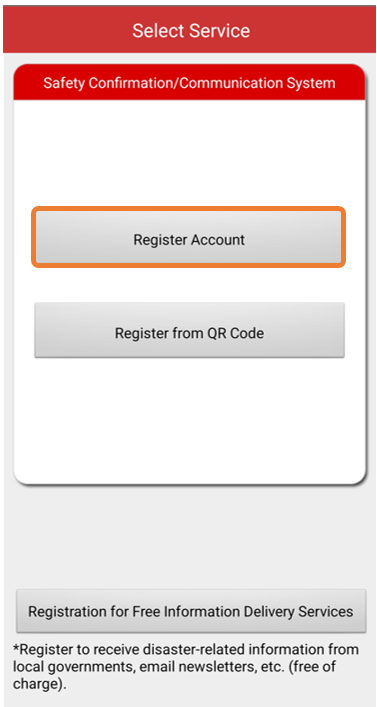
Tap "Register Account".
-
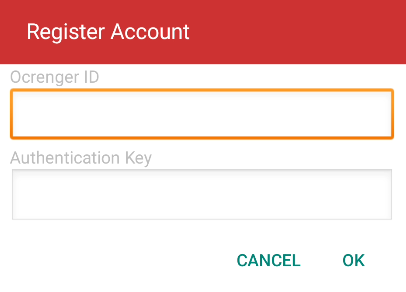
Enter your ID and authentication key stated in your Quick Start Guide and tap OK.

-
If a dialog box regarding automatic hibernation settings appears, click "SETTING".
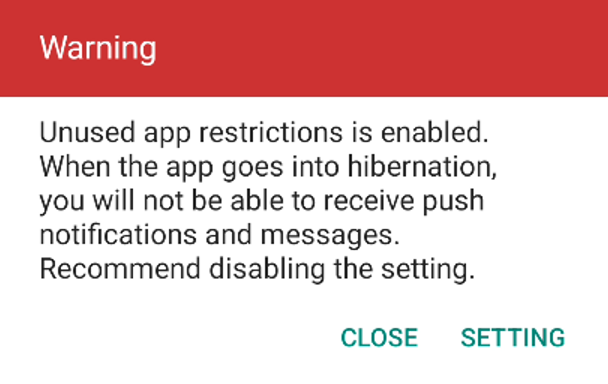
If you are using Android 11 or later, the system may automatically apply restrictions to apps that have not been used for a certain period of time.
This setting may limit the background activity of this app, which may result in unexpected performance.
On the settings screen, look for a setting item called "Unused apps," "Unused app management," or something similar. (The name may vary depending on the model.)
Switch this setting to "Disabled."
Please also see How to disable auto-pause
-
If a dialog box about alarm and reminder permissions appears, press "SETTING".
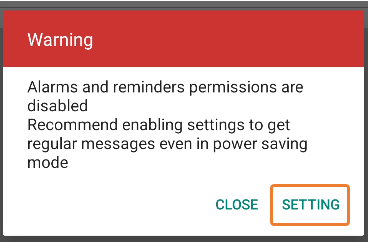
If you are using Android 13 or later, the system may automatically disable alarm and reminder permissions.
This setting may limit the background activity of this app, which may result in unexpected performance.
On the settings screen, switch the alarm and reminder permissions to "Allow."
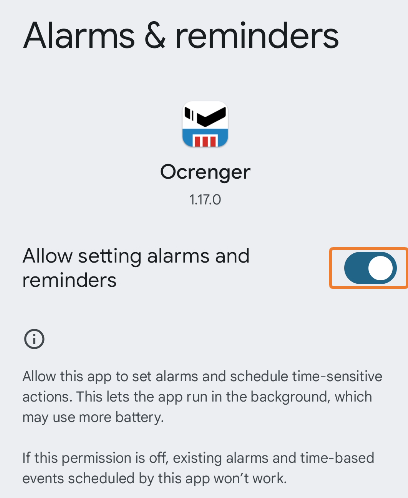
Please also see How to enable Alarm and Reminder permissions
-
Your registration is complete when Active, the user name, etc. are displayed.
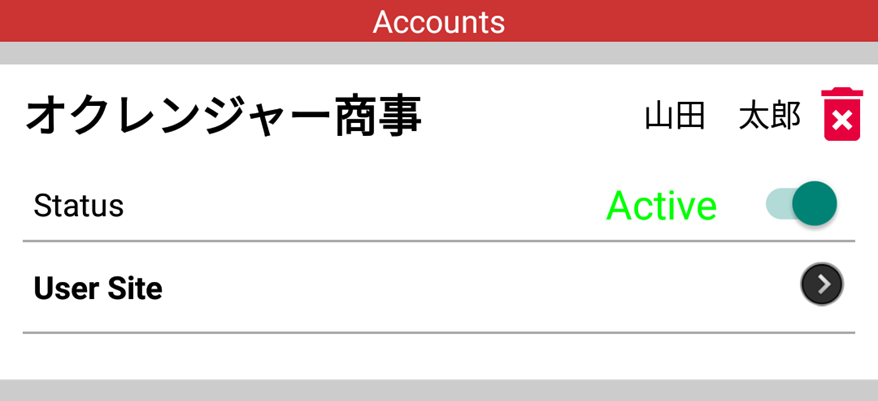
Registration of Account by Scanning QR Code
-
Tap "Register from QR Code".
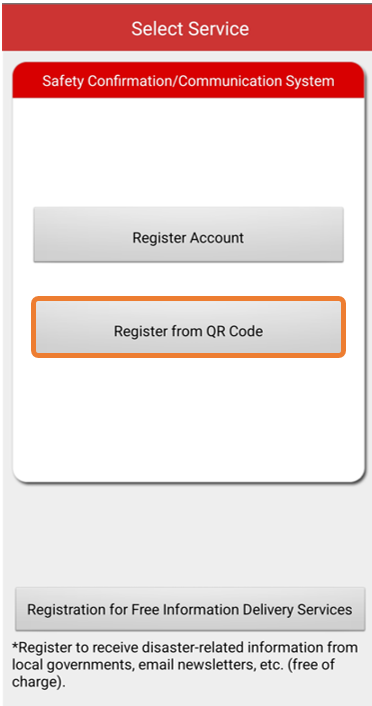
-
Your smartphone's camera will be started. Please scan QRcode in white frame.
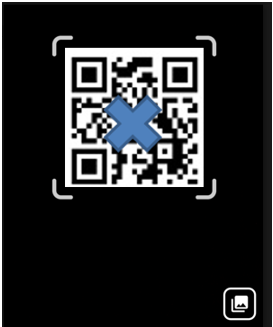
-
You can select QRcode from your picture's folder.

-
Your registration is complete when Active, the user name, etc. are displayed.

When "authentication NG" is displayed
The causes of the error message are as follows.
-
Incorrect input.
All ID/authentication keys must be entered in half-width characters.
Please be careful of similar alphanumeric characters such as the number "1" alphabet "l (l)" and the number "0" alphabet "o (o)". -
"Google Play Developer Services" for Android application is not installed. Or, it has not been updated.
Please install or update it from the Google Play.
https://play.google.com/store/apps/details?id=com.google.android.gms&hl=ja -
You are not properly connected to the Internet.
An Internet connection is used for account authentication. If the connection environment is poor, account information may not be obtained correctly.
Please check if there are any problems with the signal conditions, such as antenna display on the device. Please also try switching between mobile communication and Wi-Fi. -
ID/authentication key has been changed or deleted.
Please check with your organization administrator.
Registration for Free Information Delivery Service
It is a service for receiving email newsletters, disaster-related information from local governments, etc. This is a free service for everyone.
-
Tap Account/Menu in the app menu at the bottom of the screen.

-
Tap Account Registration.

-
Tap Registration for Free Information Delivery Services.
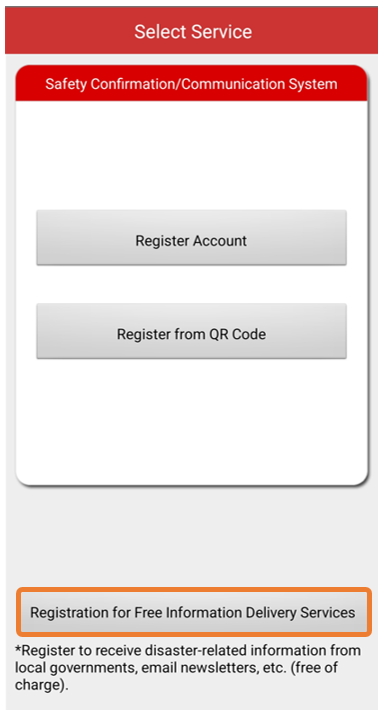
-
Enter a search keyword and tap Search.
* If you don’t enter any keywords and tap Search, all the available Free Information Delivery Services are displayed.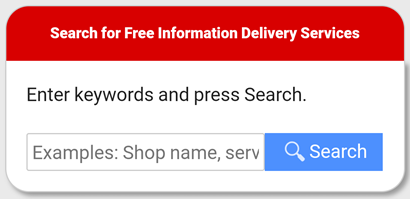
-
Tap Register for this service below the service you want to register for.
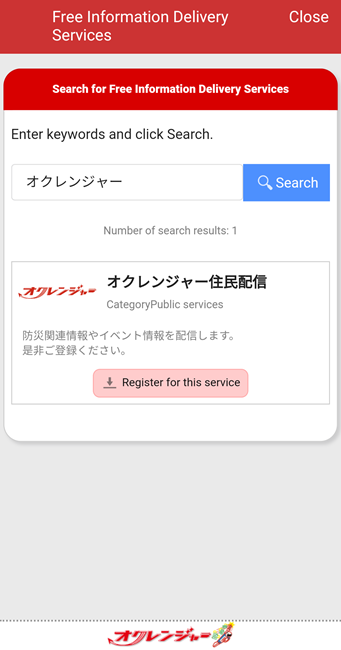
-
After registering your information by selecting the relevant option in each box, tap Check Your Entries.
* Information to be entered differs depending on the service.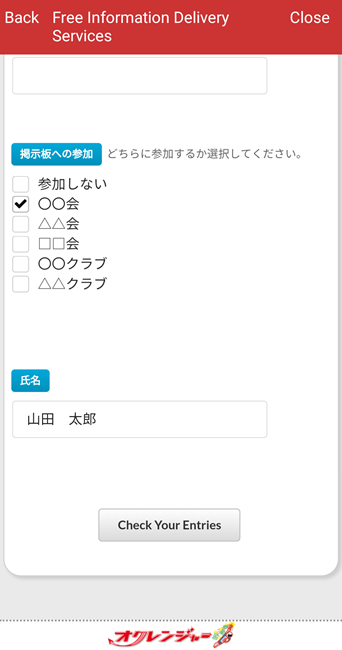
-
The page to confirm your entries will appear. Confirm the details and tap Register at the bottom of the screen.
* If you need to correct any of the information, tap Modify.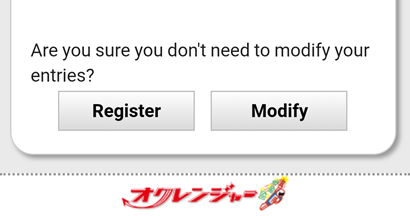
-
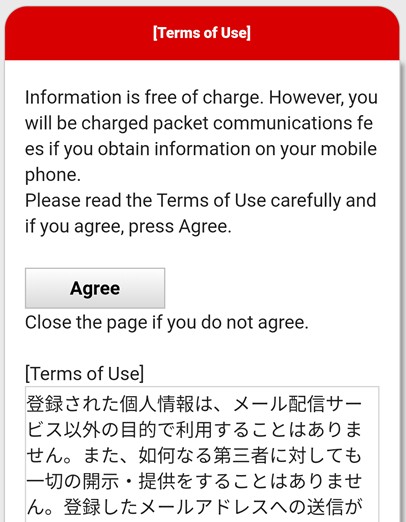
After confirming the Terms of Use, tap Agree.
-
Your registration is complete when Active, the name of the service, etc. are displayed.
Registration of Additional Account
You can register multiple accounts in the app.
-
Tap Account/Menu in the app menu at the bottom of the screen.

-
Tap Account Registration.

-
Next steps, See Registration of Account.
Deletion of Account
-
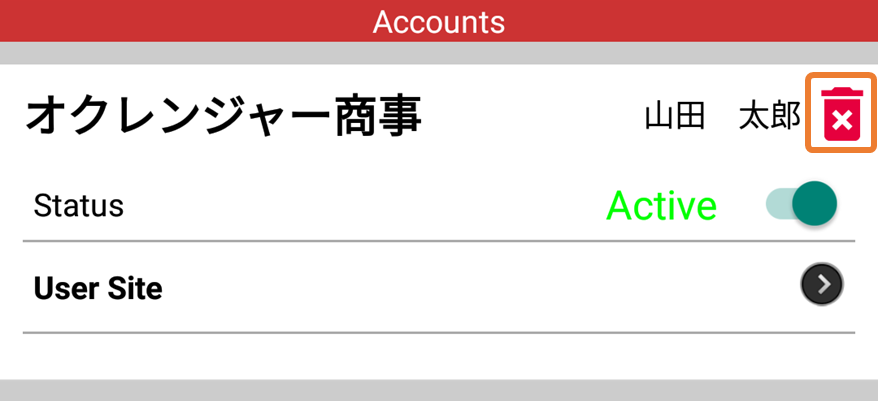
Tap Account/Menu in the app menu at the bottom of the screen.

-
Tap the icon of recycle bin for the account you want to delete.
-
If you are sure to delete, tap OK.
If you want to cancel deletion, tap Cancel.
-
Deletion of the account is complete when the account no longer appears on the Accounts.
Invalidation of Account
-
Tap the button next to Active to invalidate the account. Ocrenger will no longer receive messages to the account. Tap the button next to Disabled to validate the account. The app will start receiving messages again.

Control item Description
Home Page
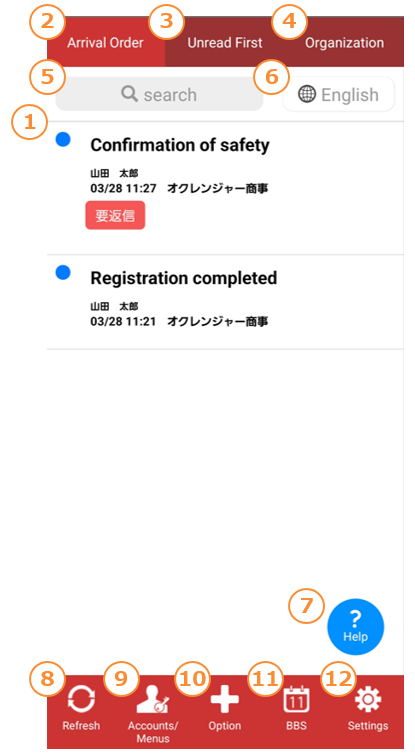
① Timeline (message list)
A list of messages received is displayed.
* Messages received after the registration of your account on the phone are displayed.
To read messages delivered before registration, tap Account/Menu > User Site > Messages.
* You cannot read messages whose posting periods have expired or that have been deleted by an administrator.
② Arrival Order
Tap it to list the messages in the order of arrival.
③ Unread First
Tap it to list unread messages at the top of the list.
④ Organization
Tap it to read messages from a particular organization.
⑤ Message Search
Tap the button to display the search screen.
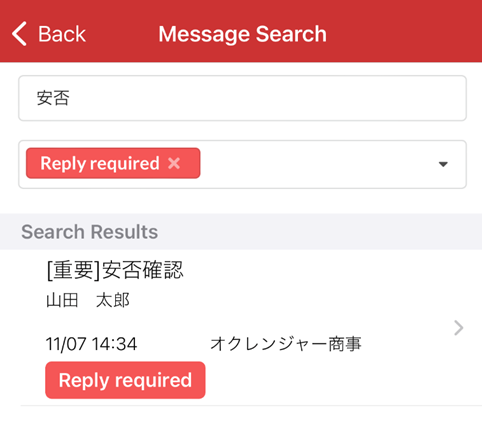
Word : Messages that contain the entered word in the subject, body, or attachment name will be displayed in the search results column.
Tag : Messages containing the selected tag will be displayed in the search results column.
* If you select multiple tags, messages containing all selected tags will be filtered.
* You can also search for messages by combining word search and tag search.
⑥ Language
Displays translations in the selected language.
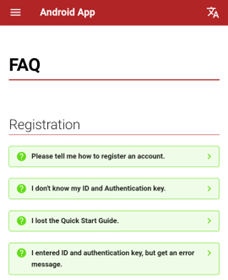
⑦ Help
Tap to go to the FAQ screen.
⑧ Refresh
Tap it to update the message list.
⑨ Account/Menu
Tap it to register, confirm, or delete an account.
Tap User Site on the page to move to the Ocrenger User Site.
⑩ Option
Tap it to view options.
There are "form", "alcohol check", and "private delivery" for options.
⑪ BBS
Tap it to view schedules/bulletin boards.
⑫ Settings (Please refer the page Setup Page)
Tap it to change settings of the app.
If you want to edit messages
* A long press on a message will reveal a checkbox.
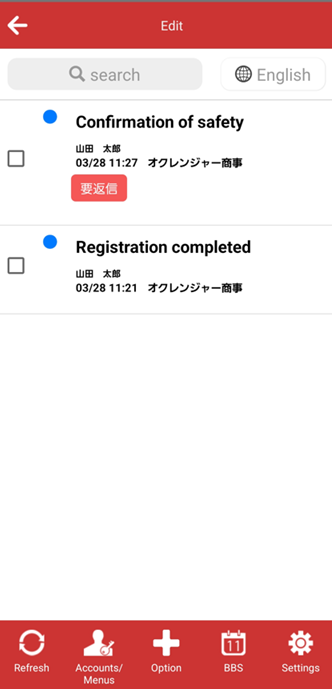
Check the box to change the message status to Read, Unread, Protected, or Cancel protection.
You can also delete selected messages from the Timeline (message list) by tapping delete.
* Even if you change the message status to Read or Unread, the status shown on the Administration Site does not change.
* Even if you select to protect some messages, you cannot read messages whose posting periods have expired or those that have been deleted by an administrator.
Only the subjects of the protected messages will remain in the Timeline (message list).
* Deleted messages cannot be displayed in the Timeline (message list)
again.
Setting and Switching of Default Browser
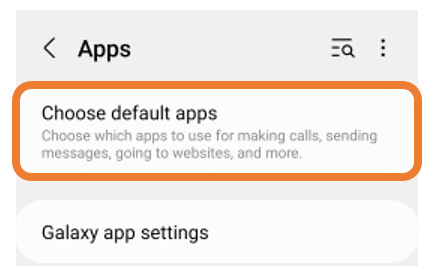
- Tap "Apps" on your smartphone's setting.
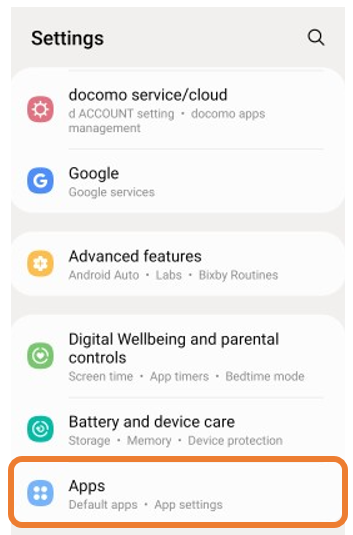
- Tap "Choose default apps".
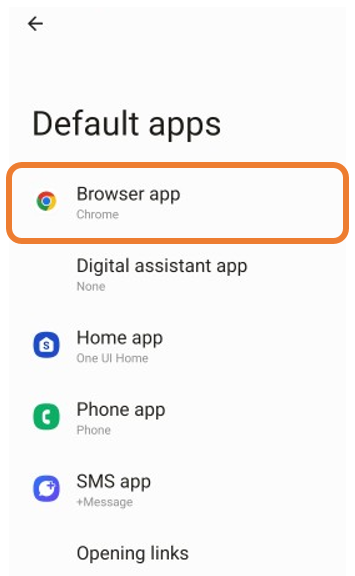
- Tap "Browser app".
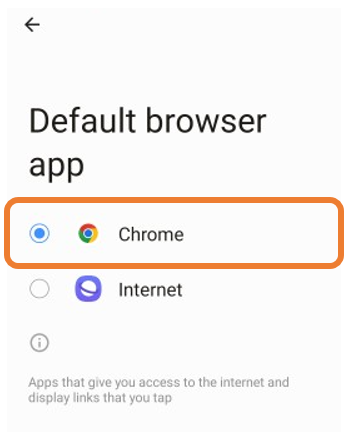
- Choose browser that you want to set for default.
Setup Page
For Android 8.0 and below.

① Two-factor authentication setting
This can only be set when two-factor authentication is enabled.
② Communication intervals
Tap it to set intervals for checking message arrival.
③ New message notification
Check the box if you want to be notified of message arrival.
④ Help Button Display
Show/hide settings for timeline help buttons.
⑤ GPS acquisition
GPS functionality can be turned on or off only when the "Private Delivery Settings" option is enabled.
⑥ GPS acquisition interval
Setting the interval for acquiring GPS information.
⑦ Transit to Private Delivery Setting
Tap to go to the Private Delivery Settings screen.
⑧ Pop-up when the screen is on
Check the box if you want to be notified of message arrival by a pop-up when the screen is on.
⑨ Pop-up when the screen is off
Check the box if you want to be notified of message arrival by a pop-up when the screen is off.
⑩ Manner mode priority
When the box is checked and your mobile phone is set manner mode, you will not be notified of message arrival by a ringtone or a vibrating alert, regardless of your settings in ⑥ to ⑧.
⑪ New message notification sound
Tap it to select a ringtone notifying you of message arrival.
⑫ Emergency notification sound
Tap it to select a ringtone notifying you of emergency message arrival.
⑬ Vibration
Check the box if you want to be notified of message arrival by a vibrating alert.
⑭ Connection Status Icon
Check the box to display notification icons on the status bar of your smartphone. If you do not want the Connection Status Icon to be displayed, uncheck the box.
* It is recommended, however, to keep the Connection Status Icon displayed so that you can readily check the connection status.
 New Message Icon
The app has received a new message
 Connection Status Icon
The app is connected to the server.
This is the icon that is usually displayed on the status bar.
⑮ Launched at System Startup
When this box is checked, the app will automatically start when your smartphone is switched on even if you have quit the app before switching off your smartphone.
⑯ Screen Theme
Tap it to select a theme color for the app screen.
⑰ Version information
The version of the Ocranger app you are currently using. You can confirm the latest version at Google Play.
⑱ Copyright information
Tap it o confirm the copyright information of the app.
⑲ Help
Check this page if you need any help with the operation of the Ocrenger App.
Change the app settings
How to set up a notification settings
Notification settings cannot be changed in the app for devices running Android 8.0 and above.
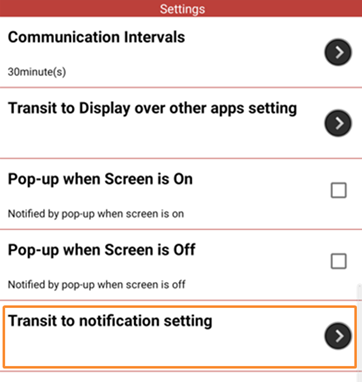
Please following steps to move to notification setting screen from "Transit to notification setting" and configure the notification settings. For other settings, please refer to the contents of “Setup Page”.
-
Tap Settings.

-
Tap “Transit to notification setting”.
-
The ocrenger notification settings screen will be displayed.
* The screen will vary depending on your device.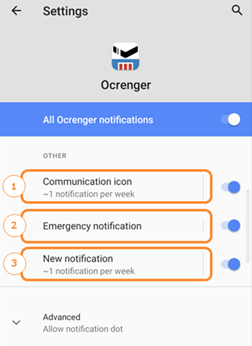
① Communication icon
This is setting for the icon always displayed when app is running.② Emergency message
Notification settings for emergency messages.③ Notify new message
Notification settings for normal messages.
How to set up a pop-up display
-
Tap Settings.

-
Tap “Transit to Display over other apps setting”.
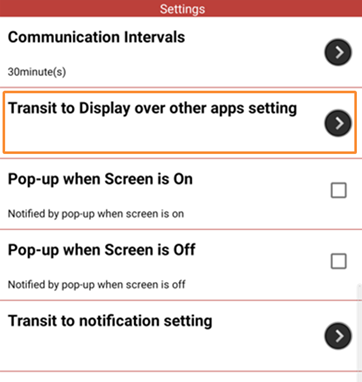
-
“Transit to Display over other apps setting” Please turn on.
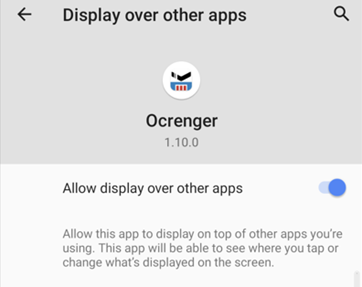
-
Press "Display Pop-Ups when Screen ON" and "Display Pop-Ups when Screen OFF".
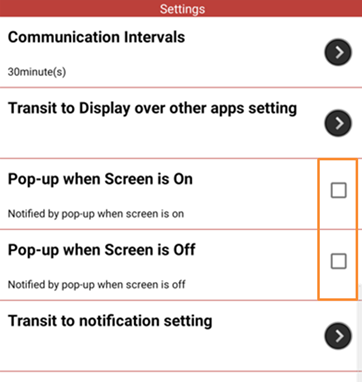
-
When the app has received a message, a pop-up will appear.
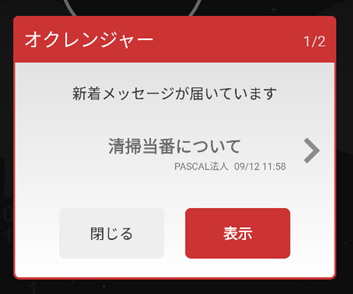
Disable “Unused App” function
The function to delete permissions and temporary data granted to an application when it has not been used for a long period of time. Since the deletion of data by this function may affect the reception of Push notifications/messages, it is recommended to disable.
-
After registering an account, a warning message will appear on the device has this function.
Tap the warning message.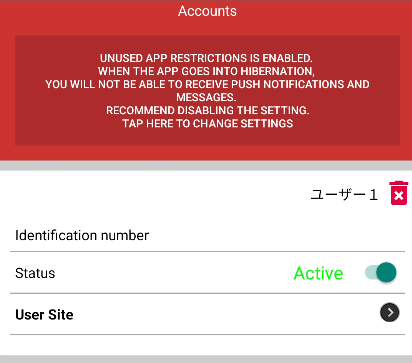
-
The settings screen will be displayed.
Turn off "Unused Apps".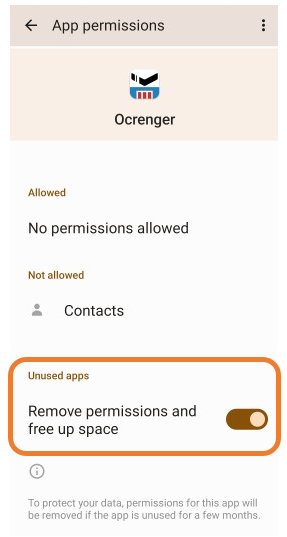
The image is in the activated state.
The settings screen can be displayed from the OS settings screen -> Ocrenger as well as from the Warning dialog.
Enable "Alarms and Reminders" permission
This is a function to ensure that the app works properly even when it is not active. If this permission is disabled, it may affect background operation, so we recommend enabling it.
-
After registering an account, a warning message will be displayed on devices with OS versions that have the target function. Tap the warning message.
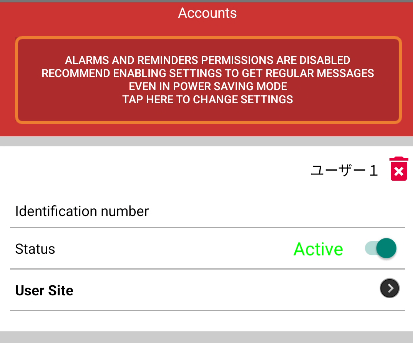
-
The settings screen will be displayed. Enable the "Alarms and Reminders" permission.

*The settings screen can be displayed not only from the warning message, but also from the OS settings screen → Ocrenger.
